A manufacturing guide to choose processes, prepare files, and get quoted with less friction.
This guide gathers the essentials for working with Matter24: how to choose between 3D printing and laser cutting, which material fits your goal, and how to upload files that arrive ready for review.
Upload STL, OBJ, or STEP. Make sure the model is watertight, scaled correctly, and free from unnecessary floating parts.
Walls that are too thin may break or not print correctly.
Assemblies and tolerances should be called out if they matter.
If appearance matters most, say whether the part is visual or functional.
Files for laser cutting
Upload vector DXF or SVG. Ideally, everything should be at real scale and already separated by operation if you know the workflow.
Avoid duplicate lines, open contours, and out-of-scale geometry.
Define thickness and material from the start so the quote can be more accurate.
If a file needs cleanup, the quote may take longer.
How to speed up the response
The clearer the context arrives, the fewer back-and-forths your project needs before being quoted.
Tell us whether you need a prototype, final part, scale model, or short run.
Specify a realistic target date and delivery method.
If you have visual references, upload them along with the main file.
Best practices
Best practices for design and file export in digital manufacturing
These recommendations reduce rework, file cleanup, dead time, and surprises when you receive the final part. If you cannot meet one of them, mention it in the notes so the team can review it with you.
Real-scale diagram with critical dimensions visible before export.
Always work at real scale
Export in millimeters or state the units explicitly. If you send a visual reference, include at least one critical final dimension.
For laser, DXF and SVG files should arrive at 1:1 scale.
In 3D, an STL without units can open far too large or far too small.
If a visible face must measure exactly, mention it in the notes as well.
Helpful example“Final logo width 120 mm in 3 mm acrylic” prevents a quote built on the wrong scale.
Visual comparison between production-ready geometry and faulty geometry.
Deliver clean, manufacturable geometry
A file can look good visually and still be problematic if it has open faces, floating solids, duplicate lines, or unclosed contours.
For 3D: avoid broken meshes, intersecting bodies, and walls too thin to print.
For laser: remove duplicate lines and close contours if they must be interpreted as areas.
Do not leave hidden geometry or old revisions inside the final file.
Common mistakeA DXF with overlapping lines can double cutting time and distort pricing.
Example of color separation for cutting, line engraving, and fill engraving.
Separate operations and priorities
When a file includes cutting, line engraving, and fill engraving, make it clear which geometry belongs to each operation. This speeds up quoting and reduces ambiguity in production.
Use consistent layers or colors if you already know the laser workflow.
If you do not have it separated, explain in the notes which zones must cut and which should only mark.
Also indicate whether finish or a visible face matters more than raw speed.
Helpful example“Red = cut, blue = line engraving, green = fill engraving” avoids unnecessary manual interpretation.
Clearance reference between parts to validate final use and assembly.
Give usage and assembly context
Even the best file is incomplete if we do not know what the part will do, how it fits, or which tolerances are critical.
Clarify whether it is a visual prototype, functional part, jig, display, or short run.
Say if it must fit another part, slide, thread, or bear load.
If you accept slight variation in color, texture, or process, say so from the start.
Helpful example“Must fit an existing lid and leave 0.3 mm clearance” avoids receiving a part that looks correct but is frustrating to use.
Flow inside Matter24
What happens from the moment you request a quote until you receive your product
This is how the process is divided so you always know where to check your project: first quote, then payment, and finally order tracking.
Without an account
You request a quote as a guest
Ideal if you want to request a quote quickly and create your account later.
You upload your file, choose the process, and submit the request.
Matter24 generates a quote number and also sends it by email.
The team reviews the file and prepares the commercial quote.
If you later create an account, you can link that quote number and continue from My quotes.
With an account
You request a quote from your account
This is the most convenient path if you want to keep files, revisions, and quotes in one place.
You upload your file to My files and complete the quote request form.
The request reaches the internal team with your notes, material, quantity, and delivery method.
Once the quote is ready, you receive it in My quotes together with the PDF and total.
While it remains unpaid, the project stays in My quotes and does not appear in the tracker yet.
After payment
Your quote becomes a trackable order
Once the charge is validated, the commercial quote gives way to fabrication tracking.
You pay from the quote through Mercado Pago.
Matter24 validates the payment and activates the order automatically.
From that moment on, project progress is checked in My orders and in the dashboard Fab Tracker.
When the order is finished, the tracker shows the final status and the history stays available in My orders.
Order stages
What each Fab Tracker step means
The tracker only appears once a payment has already been confirmed. Before that, the correct reference is My quotes.
1
Files received
We already received the file and linked it to the order. This is where production preparation begins after payment.
2
Payment received
The payment was validated and the job can now move into preparation and internal scheduling.
3
Preparing file
We are preparing your file for manufacturing: cleaning geometry, checking material, nesting parts, and getting production ready.
4
Manufacturing
Your part is already being manufactured or printed.
5
Quality assurance
We review dimensions, finish, and general condition before packing or delivering.
6
Packaging
The product is being protected and prepared for shipping or pickup.
7
Ready for delivery / pickup
Your order is ready for delivery or pickup according to the selected method.
8
Delivered
The cycle is finished: the order was already delivered or marked as completed.
Laser operations
What each operation type means in the DXF editor
In the editor you can mark each geometry according to the manufacturing result you need. These references help you choose quickly between cutting and engraving levels.
Full cut
Cuts all the way through the material to separate contours, holes, and final parts.
Use it for outer perimeters or functional perforations.
If you do not want to separate the part, do not assign it as cut.
LC engraving (light)
Engraves the material lightly for subtle marks, guides, or soft contrast.
Ideal for fine text, light markings, and controlled visual detail.
It can be applied as line or area depending on the selected geometry.
HC engraving (deep)
Engraves the material more strongly to achieve higher visual presence and contrast.
Recommended for logos, graphics, or text that must stand out clearly.
It usually implies more machine time than a light mark.
LC engraving (area)
Marks closed surfaces with a light, even engraving. It is useful for filling icons, backgrounds, or soft-contrast zones without cutting through the part.
Use it when you want subtle shading or a soft visual presence across a full area.
It works best with clean closed contours; if the area is slightly open, the editor can still illustrate it, but closed geometry remains the ideal input.
HC engraving (area)
Fills surfaces with a stronger engraving to create solid zones, more prominent logos, or backgrounds that need to stand out.
It is a good option for filled graphics, marked plates, or elements that need to read clearly at first glance.
It normally takes more machine time than line engraving and light fills, so use it where contrast truly matters.
Process knowledge
Guides to choose process, material, and level of detail
Quick guide
Which process fits your job
Geometry, finish, and lead time change dramatically from one process to another. This guide helps you choose more confidently.
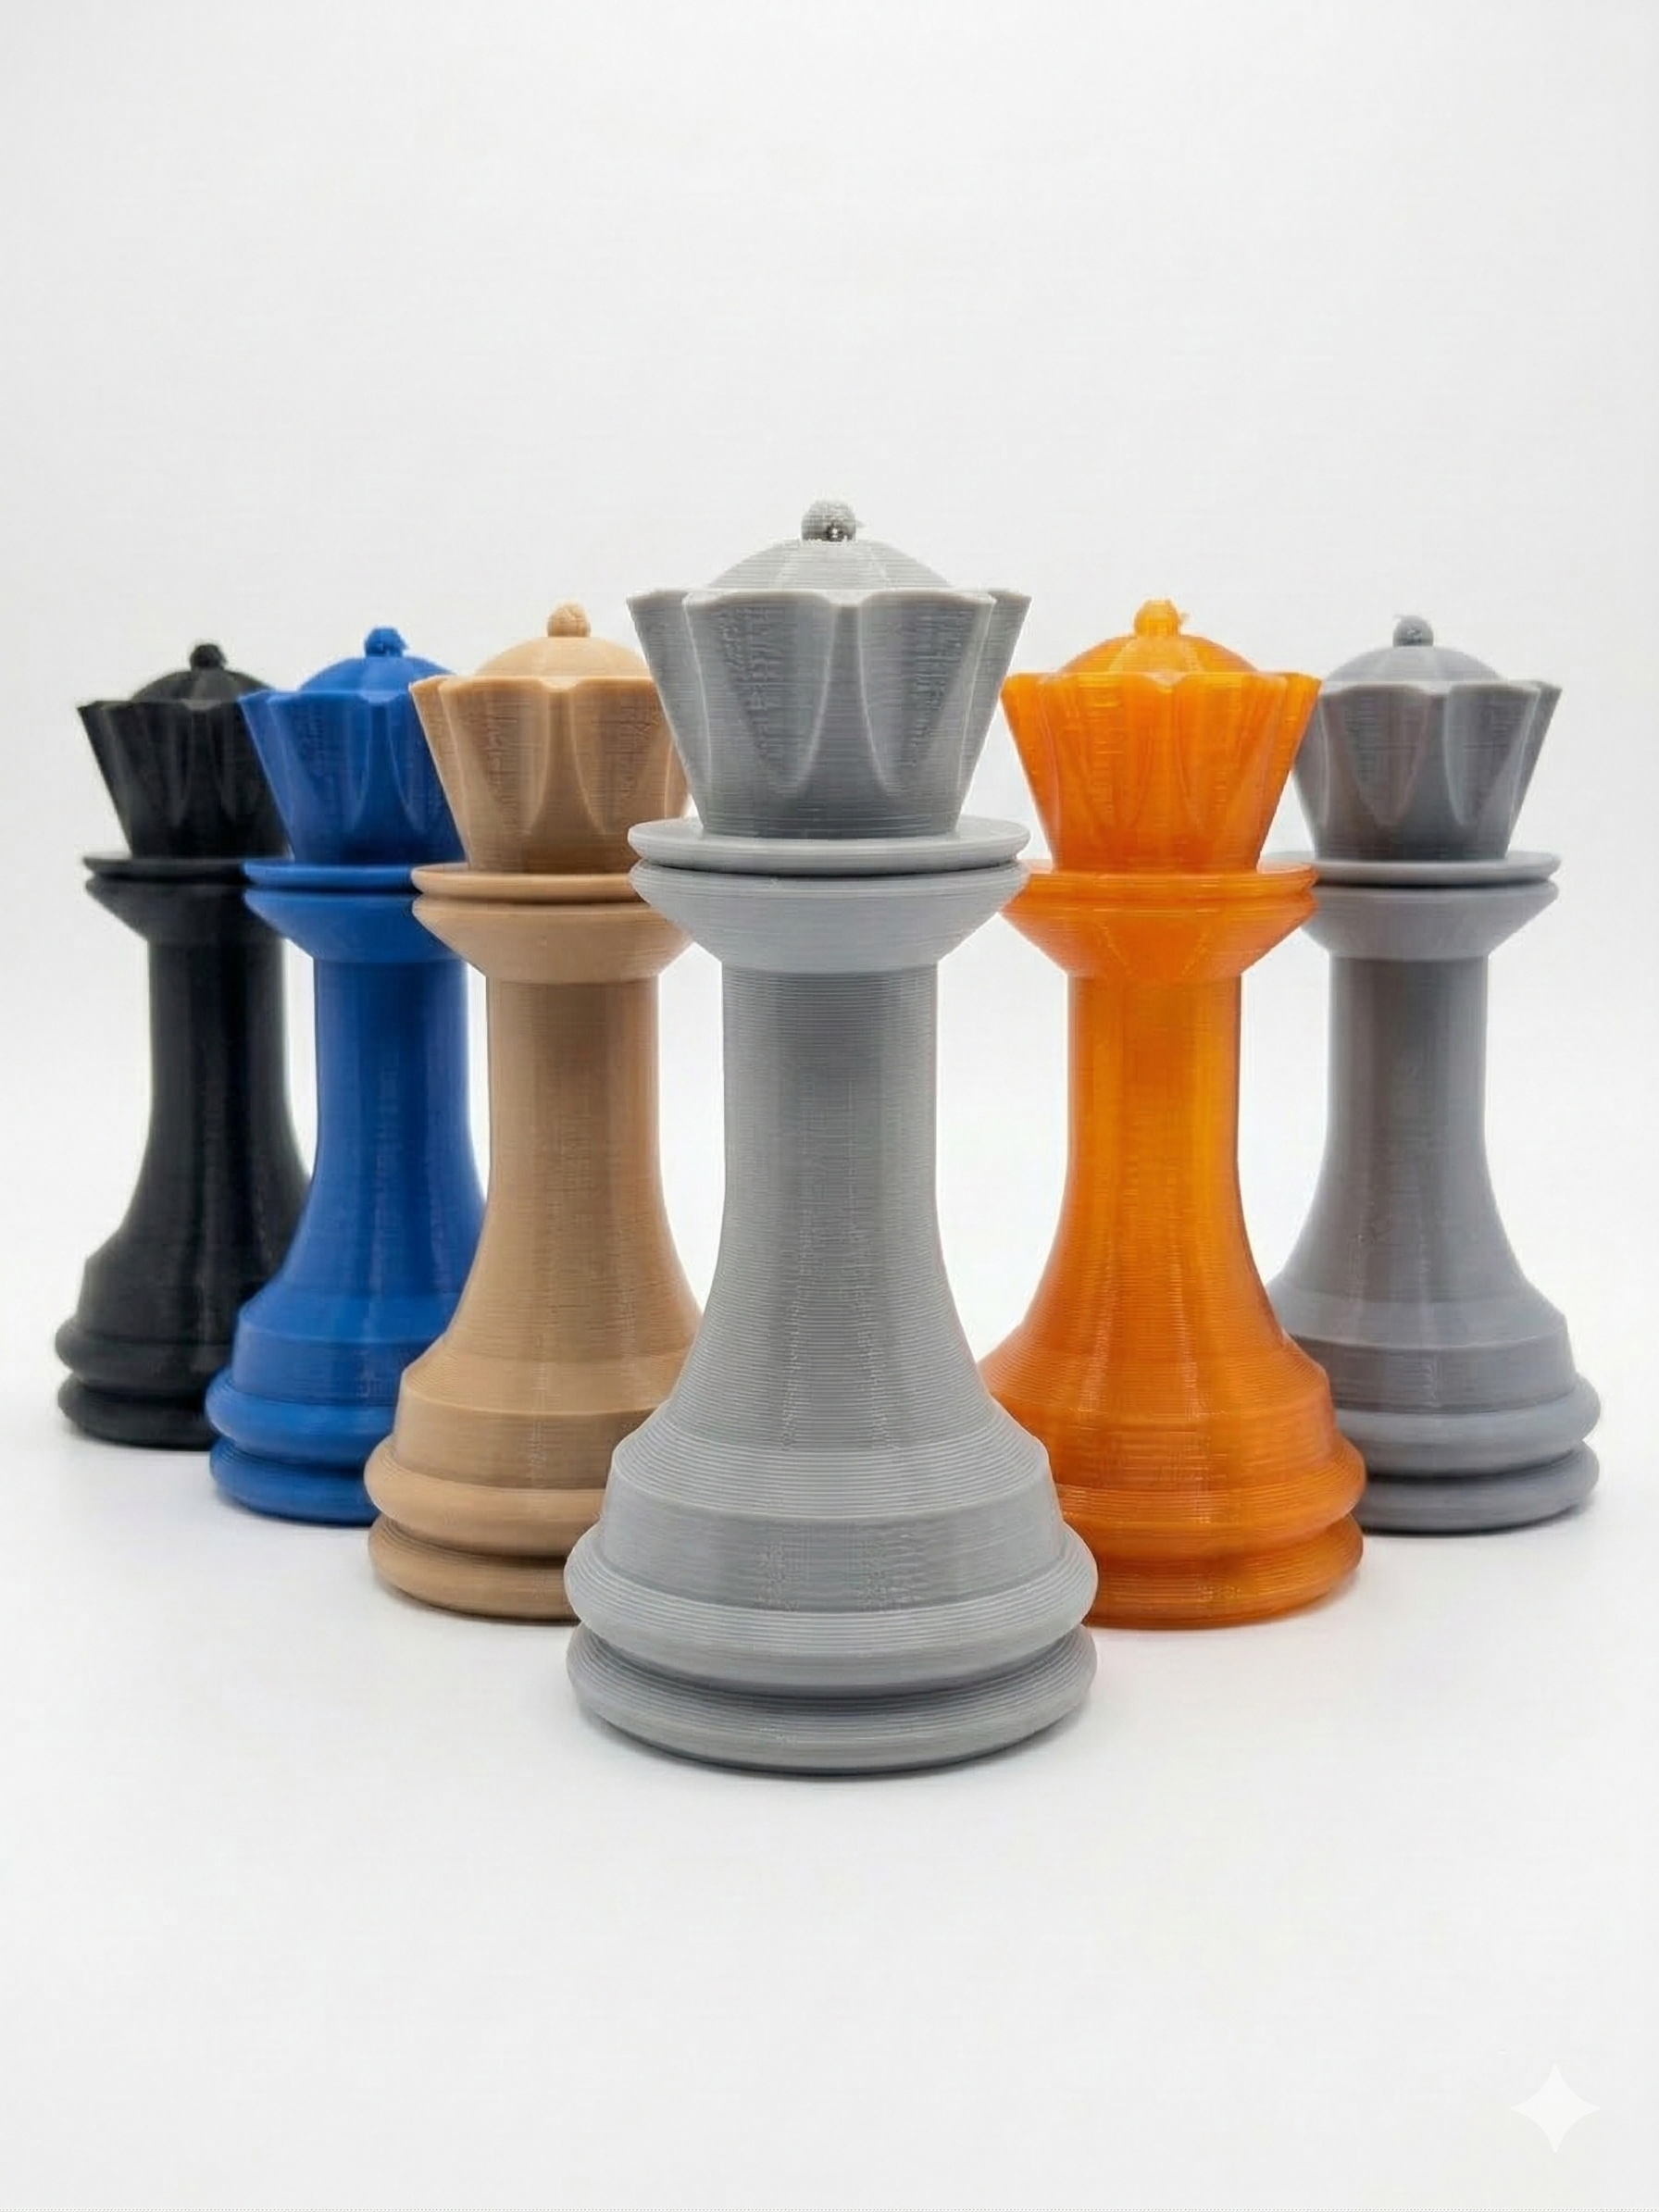
3D printing builds volume layer by layer and works best for truly three-dimensional parts.
Laser cutting starts from flat sheet stock and shines in panels, boxes, signage, and fast repeatable parts.
Volume and complex forms
3D printing
Best for functional prototypes, enclosures, assembly parts, and models with curves, cavities, or shapes that cannot come from flat stock.
STL / OBJ / STEP3D partsFast iteration
Geometric freedom
Functional detail
Batch speed
Use it when the final part cannot be solved from a flat sheet.
Great for validating fit, shape, and ergonomics before production.
Flat and repeatable parts
Laser cutting
Excellent for panels, templates, boxes, signage, and 2D components cut from MDF or acrylic at high speed.
DXF / SVGSheet stockShort runs
Speed
Edge finish
Volumetric work
The design must resolve from flat material with a defined thickness.
It is usually the best route if you need several identical parts quickly.
If you upload PNG or JPG files, add final dimensions, desired thickness, and finish notes so we can guide you accurately.
3D materials
How to choose a 3D printing material
There is no universal material. Rigidity, heat resistance, flexibility, finish, and cost all change depending on the application.
PLA is usually the safest starting point for visual prototypes and design validation parts.
ABS, TPU, and PA-CF fit better when you need heat resistance, flexibility, or higher technical performance.
Good finish, accessible cost, and excellent print stability. Very useful for presentation models, shape validation, and early prototypes.
Lower costGood detailGeneral use
Rigidity
Heat resistance
Ease of fabrication
Ideal when the part will not face high heat or strong impacts.
Often the best option to validate a design quickly.
More resistant in use
ABS
Handles heat and impacts better than PLA. Good for enclosures, functional parts, and components that will live in more demanding environments.
More durableHandles heatFunctional use
Impact
Heat resistance
Ease of fabrication
It can need more dimensional and finishing control than PLA.
A strong option when the prototype is moving toward real functional tests.
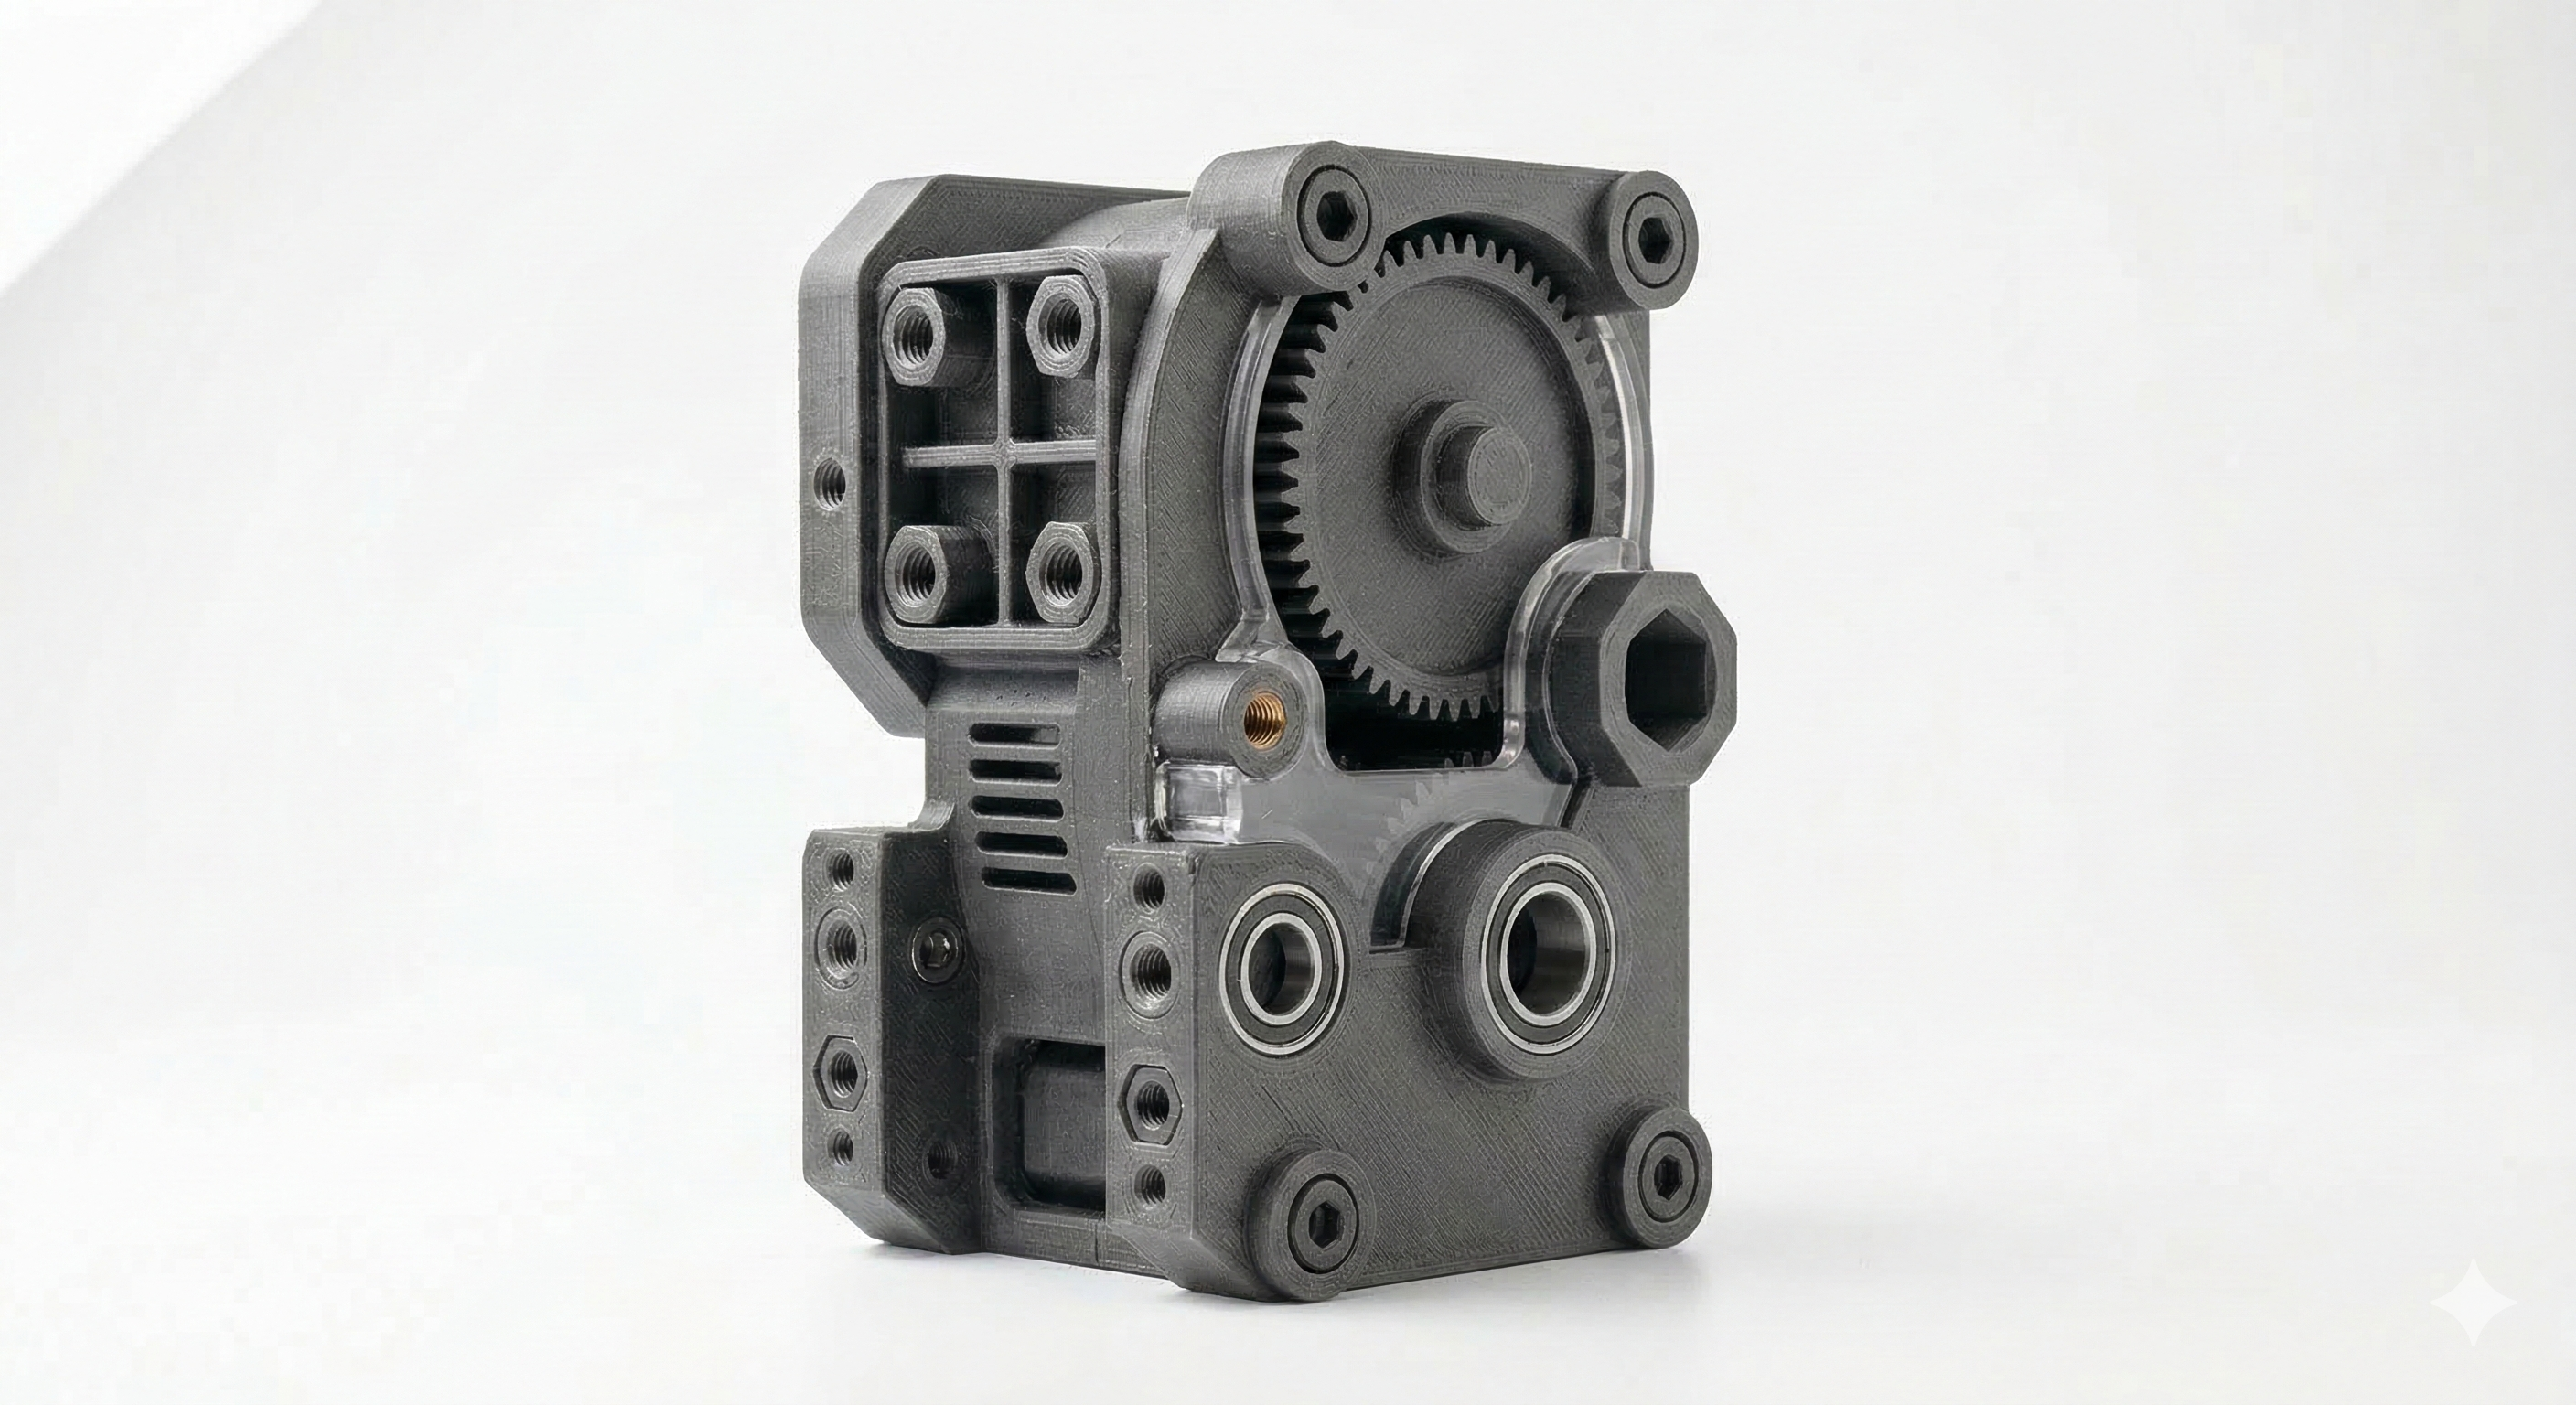
Flexible and cushioning
TPU
A flexible material for covers, bumpers, seals, and parts that must absorb impact or deform without breaking.
FlexibleCushionsGrip
Flexibility
Cushioning
Structural rigidity
Usually not the best option for rigid parts or very tight tolerances.
It stands out when you need grip, elasticity, or vibration absorption.
Technical performance
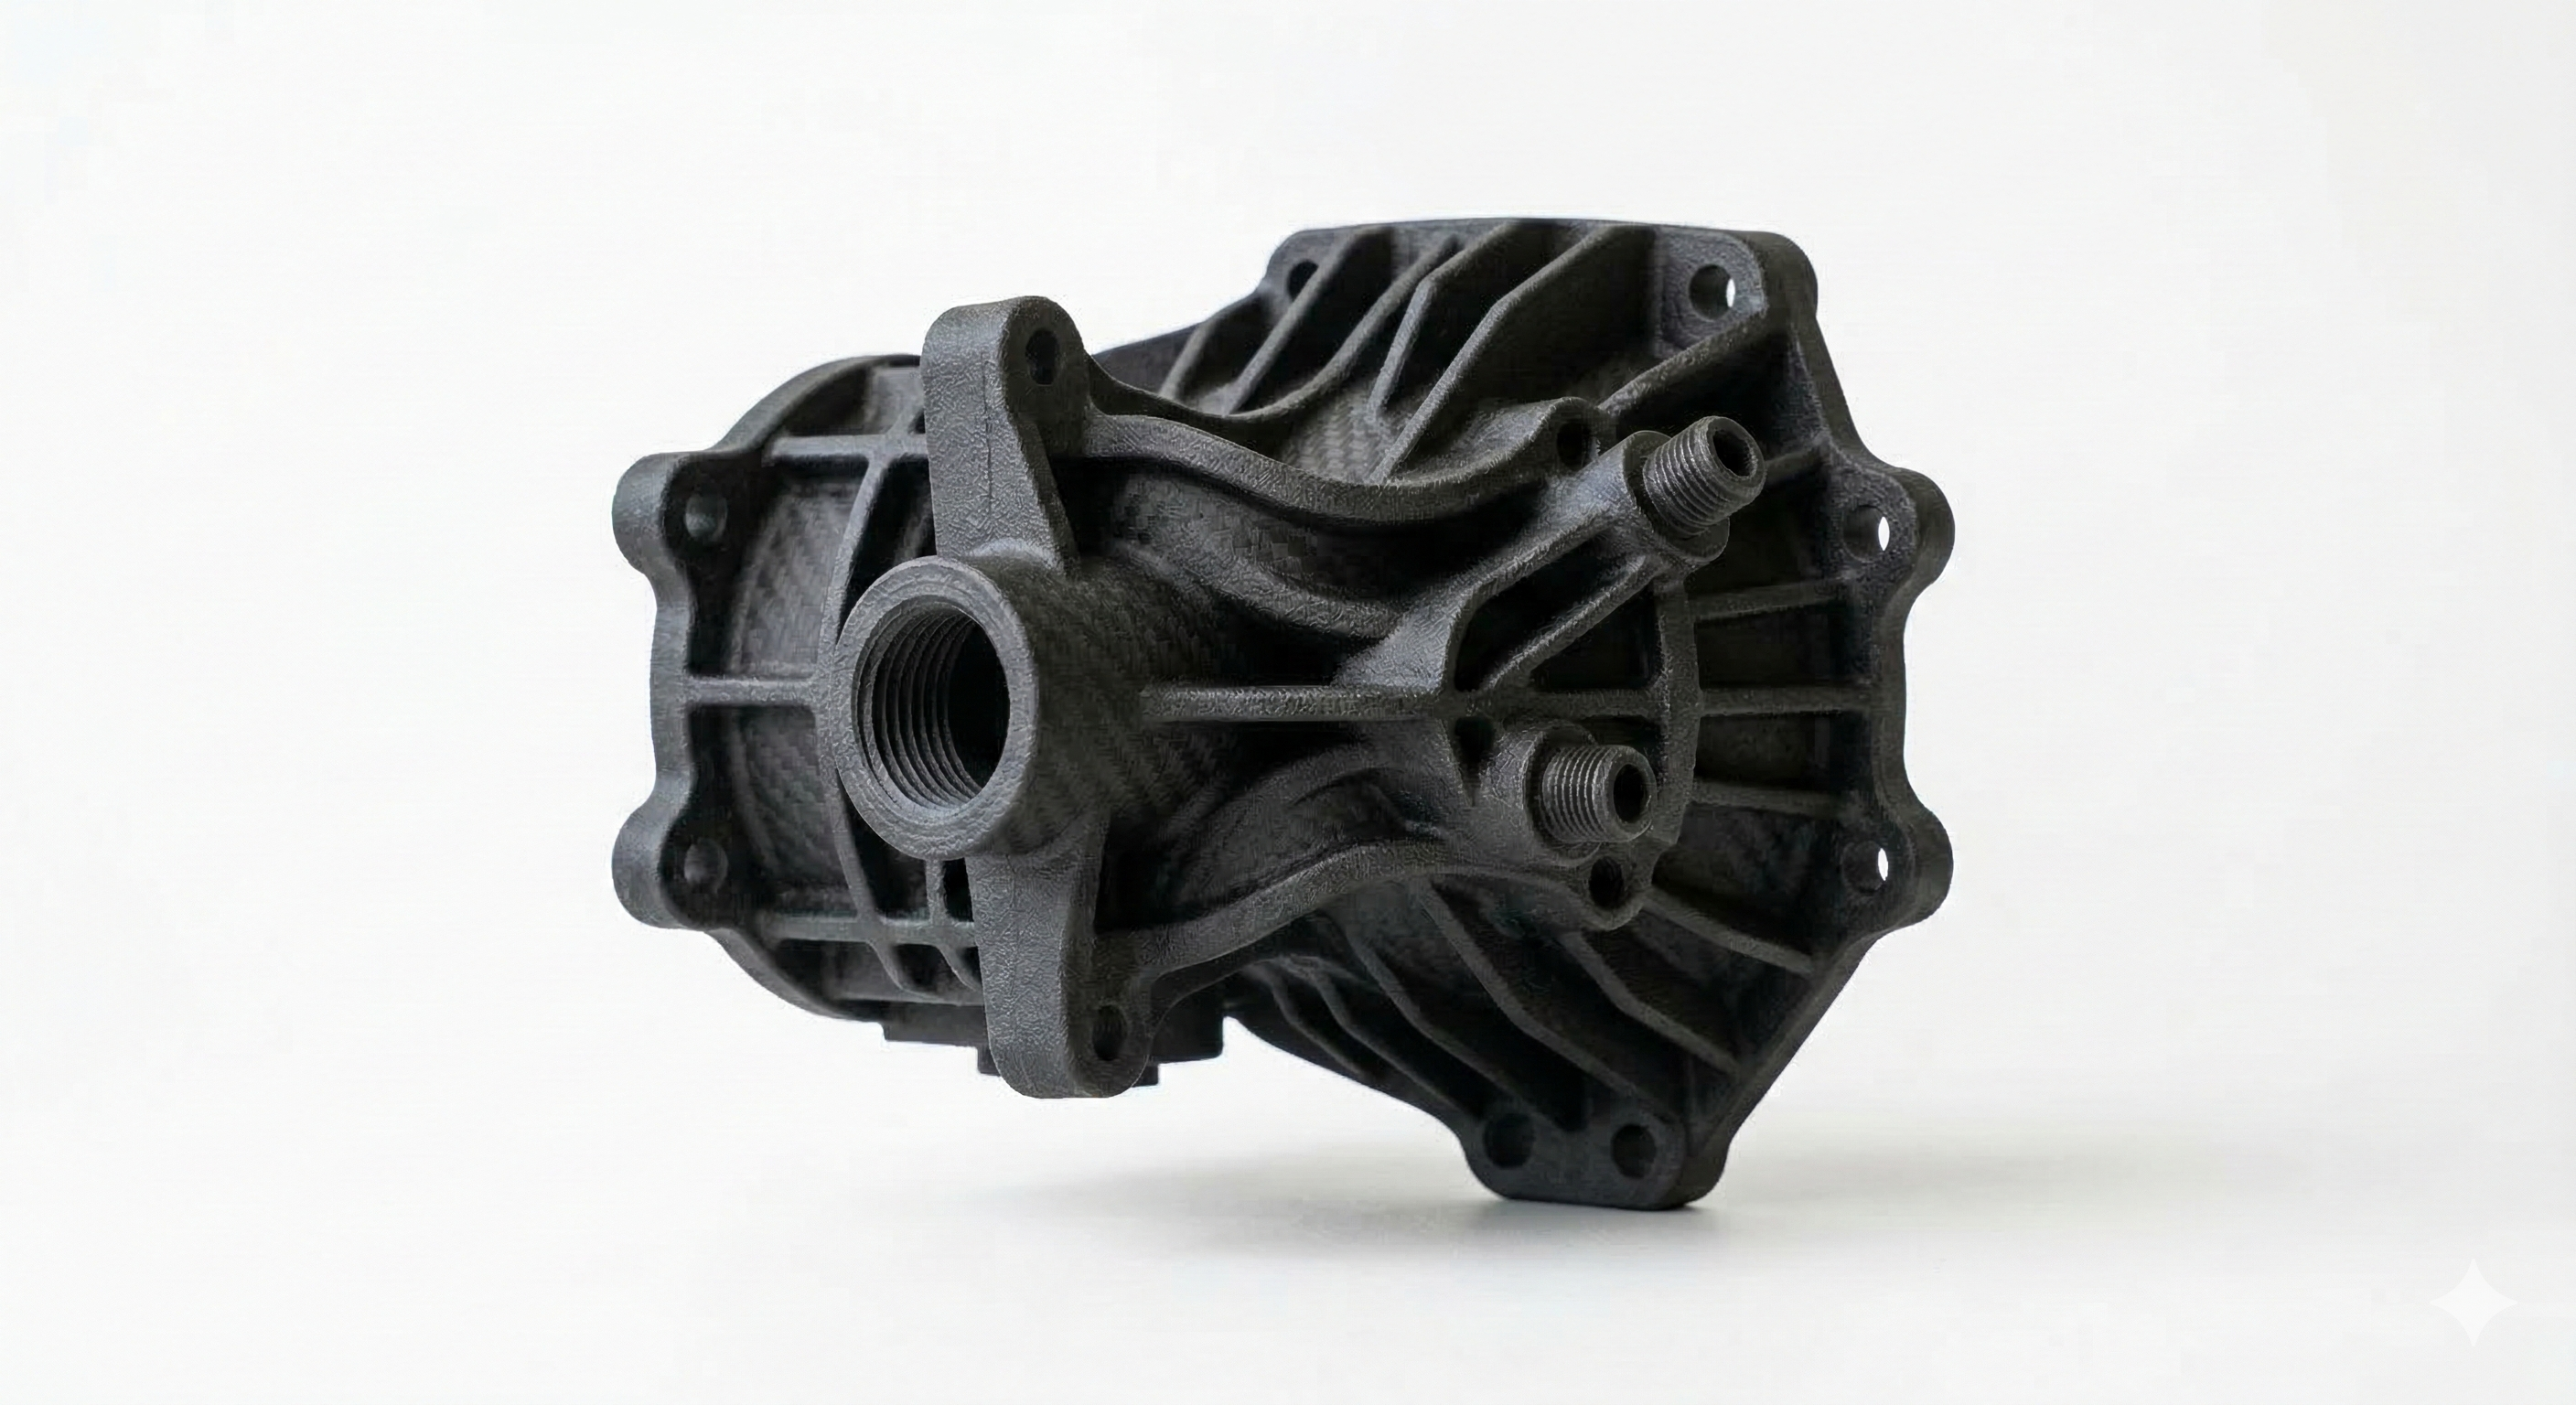
PA-CF
Nylon reinforced with carbon fiber. Chosen when stiffness, weight-to-strength ratio, and a more technical appearance matter.
High stiffnessLightweightDemanding use
Rigidity
Weight/strength
Cost
Useful for jigs, technical parts, and prototypes that approach real use.
Usually the premium material in the comparison and should be justified by the application.
If you are unsure, choose PLA for the first iteration or leave a note about the final use and we will guide you before fabrication.
Laser materials
Which laser material to choose
Here the decision usually depends on the stiffness you need, the look of the part, and whether you want an economical result or a more premium finish.
MDF is practical and economical for prototypes, boxes, and internal-use components.
Acrylic offers visual presence, polished edges, and better performance in display-oriented pieces.
Light and affordable
MDF 3 mm
A good option for quick prototypes, lightweight panels, models, and low-weight boxes.
Accessible costEasy to paintIndoor use
Rigidity
Visual finish
Affordable cost
Works best for non-structural or lightly loaded parts.
May need extra finishing if you want a very clean final look.
More body and support
MDF 6 mm
Adds rigidity for boxes, frames, and flat parts that need more support.
More rigidGood supportIndoor use
Rigidity
Visual finish
Weight
Useful when 3 mm feels too flexible for the design.
Still a very cost-effective solution for functional flat parts.
Clean and attractive
Acrylic 3 mm
Excellent for displays, signage, covers, panels, and parts where appearance matters.
Polished edgePremium lookCan be translucent
Rigidity
Visual impact
Cost
Ideal if the part will be highly visible or used in a display context.
It usually looks better than MDF when appearance is part of the product.
More presence and thickness
Acrylic 6 mm
A more robust version for premium parts, bases, supports, and elements with stronger visual presence.
More solidPremium finishGreater thickness
Rigidity
Visual impact
Weight
A good choice when 3 mm looks too thin or flexible for the project.
Usually reserved for parts that combine function and strong presentation.
If cost is the priority, MDF is usually the first option. If visual presence, clarity, or polished edges matter more, acrylic usually wins.
3D printing settings
How to choose print quality and precision
Quality defines layer height and print speed. High precision prioritizes tolerances and stability for parts where fit matters more than speed.
Normal prints faster and is often enough for early validation or large parts.
Fine is the best general balance for functional prototypes and pieces that already need a good presentation.
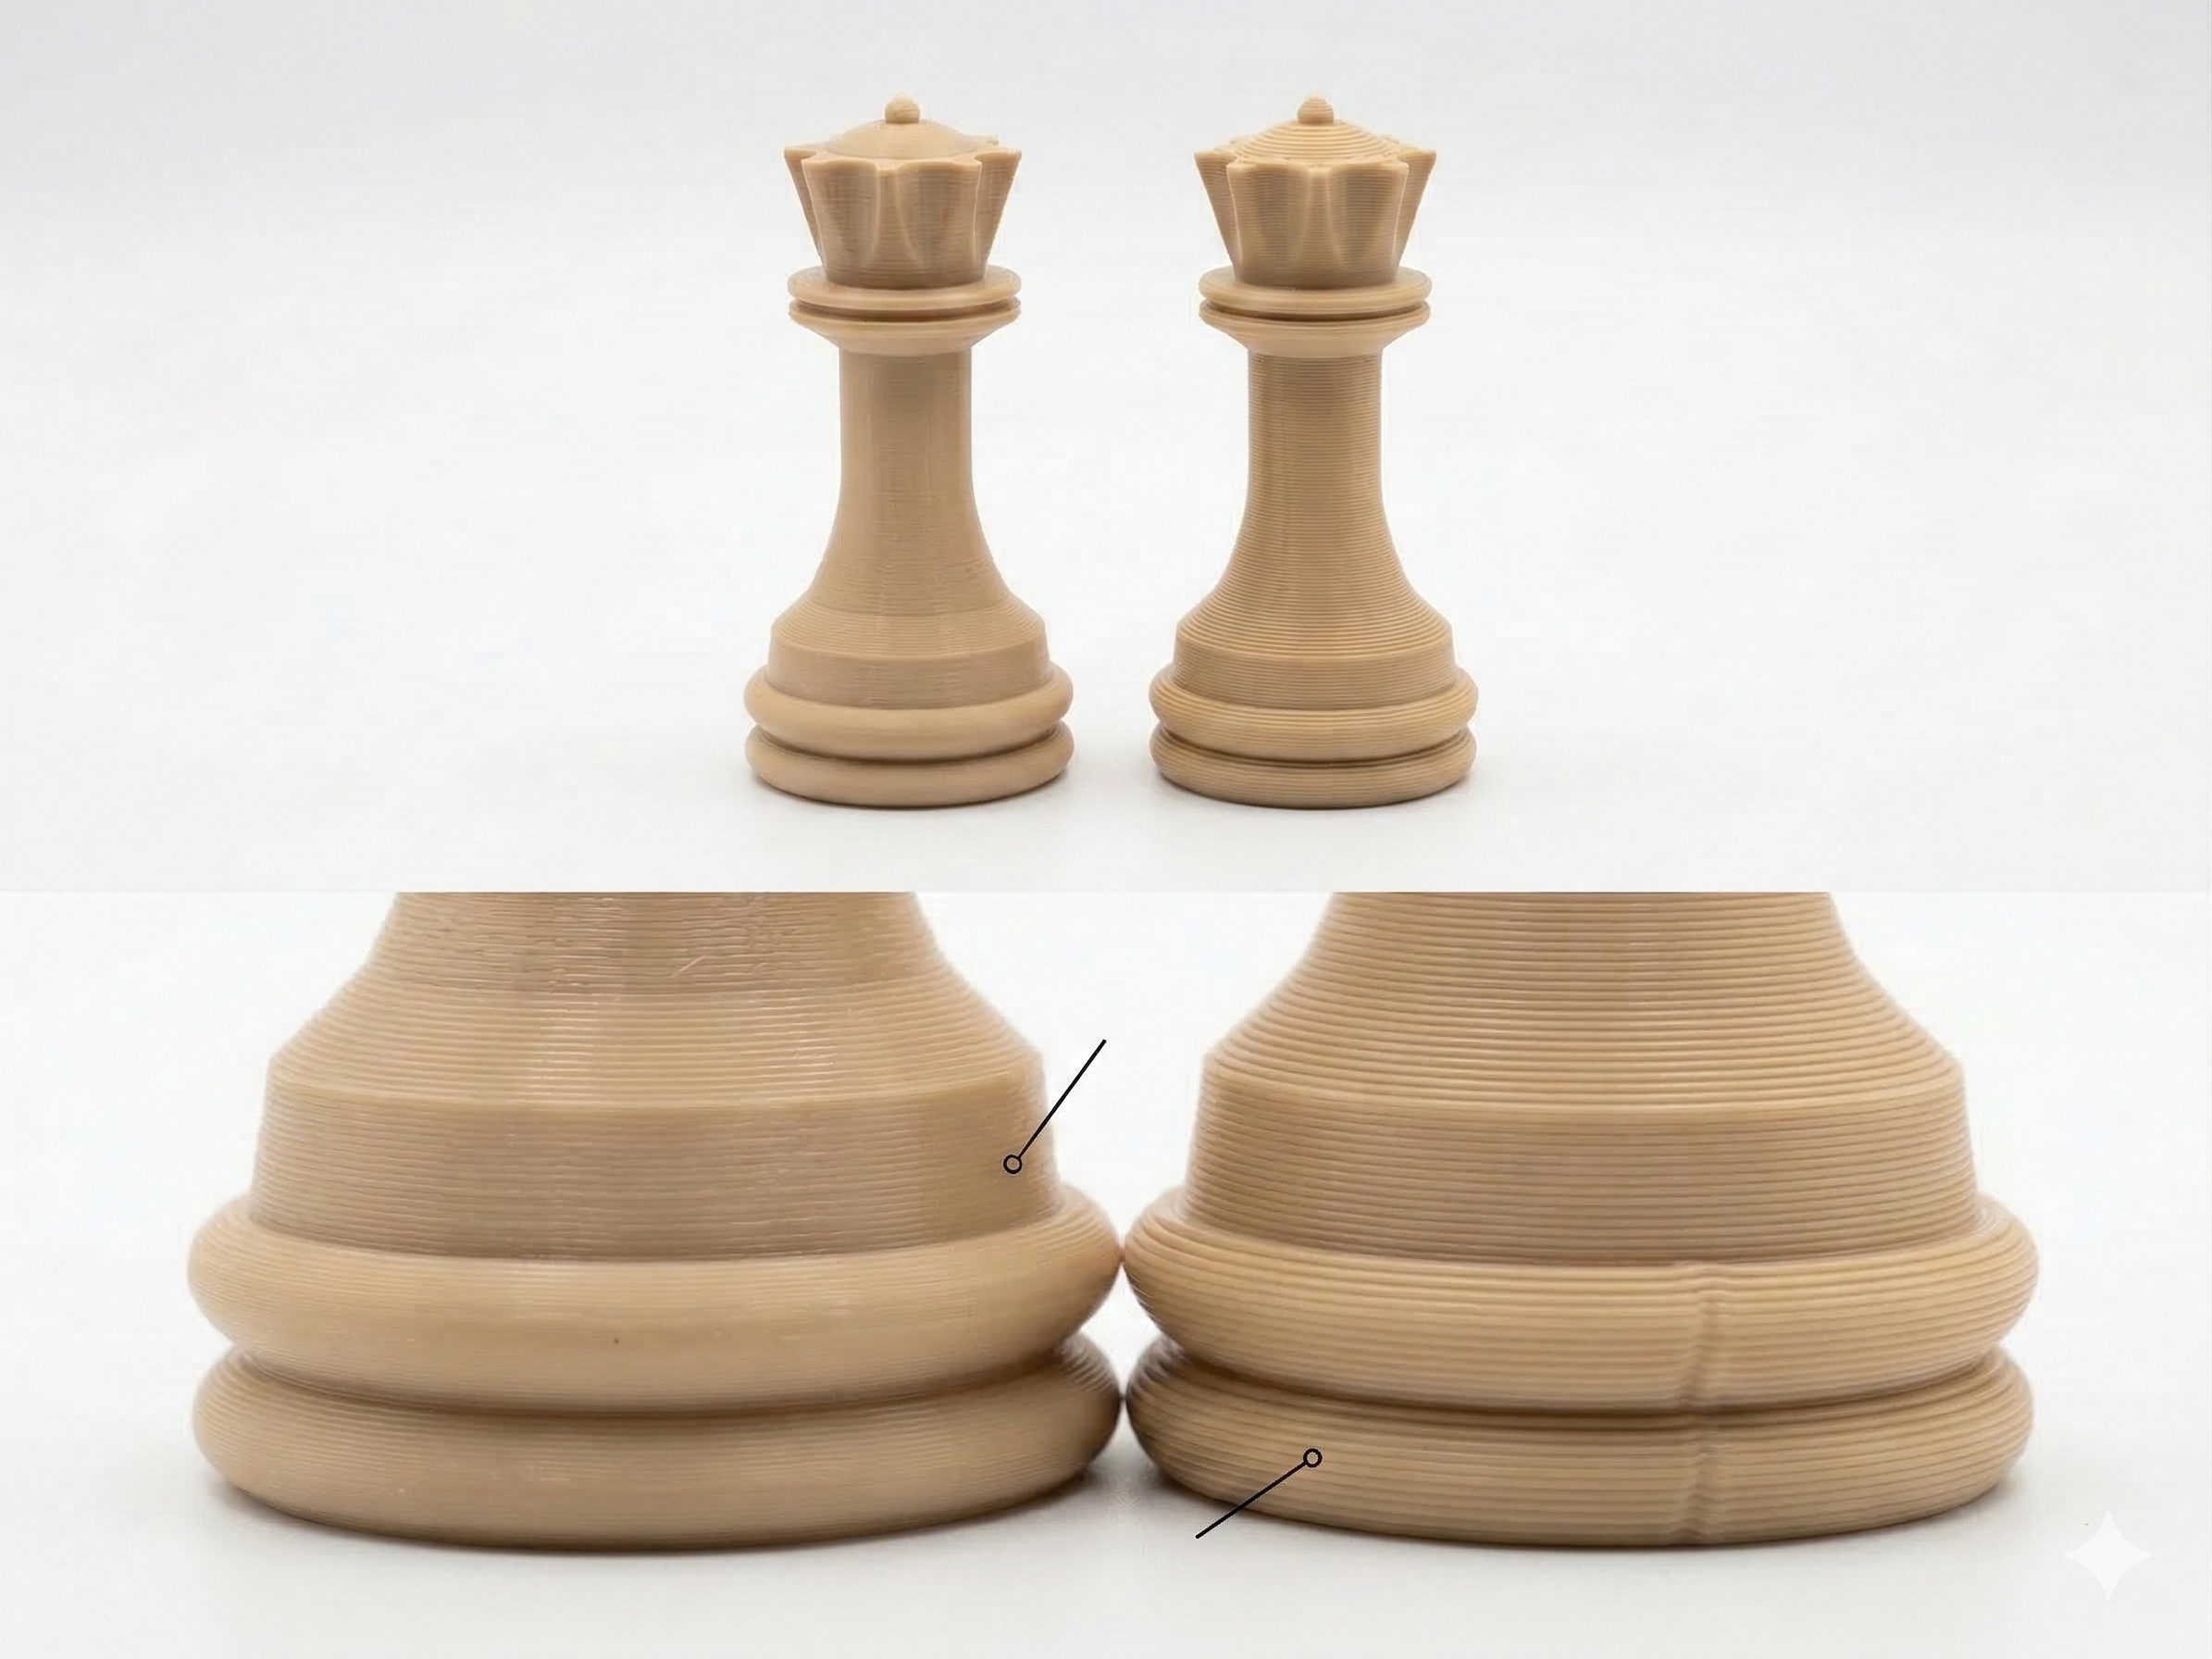
Super fine lowers layer height for smoother surfaces, smaller detail, and better visual quality.
High precision helps when there are assemblies, critical holes, or dimensions that need better control.
Fastest
Normal
Higher layers and faster production. Useful for early iterations, volume validation, and parts where finish is not the main priority.
Faster deliveryLower detailEarly prototype
Speed
Surface finish
Fine detail
A good choice when you are still adjusting the overall geometry or size.
Not the best route when the part must look very clean or hold small features.
Recommended balance
Fine
Balances time, detail, and cost. It is the safest setting for most functional prototypes and technically presentable parts.
General balanceGood finishRecommended
Speed
Surface finish
Fine detail
Usually the best default choice unless you have an extreme requirement.
Works very well when you want a useful part with a strong visual finish.
Maximum detail
Super fine
Lower layers and slower production to improve surface finish, small details, and the overall visual quality of the part.
More detailMore timeBetter finish
Speed
Surface finish
Fine detail
Useful for visual parts, textures, small text, or jobs where appearance matters a lot.
Usually increases print time and therefore cost versus the other options.
Dimensional fit
High precision
Not always the smallest layer height; it prioritizes calibration, tolerances, and stable printing conditions for parts that must assemble or respect key dimensions.
TolerancesAssembliesCritical dimensions
Dimensional fit
Speed
Review need
Enable it if the part must snap, slide, close, or mount with others.
If the file contains specific tolerances, include them in the notes as well.
If you only need a well-made functional part, Fine is usually the best base. Turn on high precision when there are assemblies or critical dimensions.
Material color
How to choose color for your part
Color depends on material, process, and stock. Choosing it here helps us quote better, but some combinations may still require confirmation.
In 3D printing, color usually comes from the filament of the selected material.
In laser work, MDF normally starts in a natural tone while acrylic may come in colors or transparency depending on availability.
If exact brand color matters, mention it in the notes as well.
The most flexible option when color is not critical. It helps quoting and production move faster because it allows the most immediate stock to be used.
More flexibleLower riskFaster delivery
Availability
Flexibility
Visual specificity
Useful when geometry, function, or fit matter more than color.
Also helpful if the final color will be defined later.
Defined color
Specific color
Choose a defined color when presentation, visual consistency, or a client-facing use makes the appearance of the piece important.
PresentationMore preciseMay need confirmation
Availability
Flexibility
Visual specificity
If the tone is critical, leave a note or visual reference so the team can validate it before production.
Some materials have fewer available colors than others.
If color is central to the result, mention it in both the selector and the notes so the quoting team can confirm availability early.
Listo para avanzar
Once your file is ready, the next step is to quote it.
If you still doubt between materials or processes, add notes. Our team can guide you during the review.